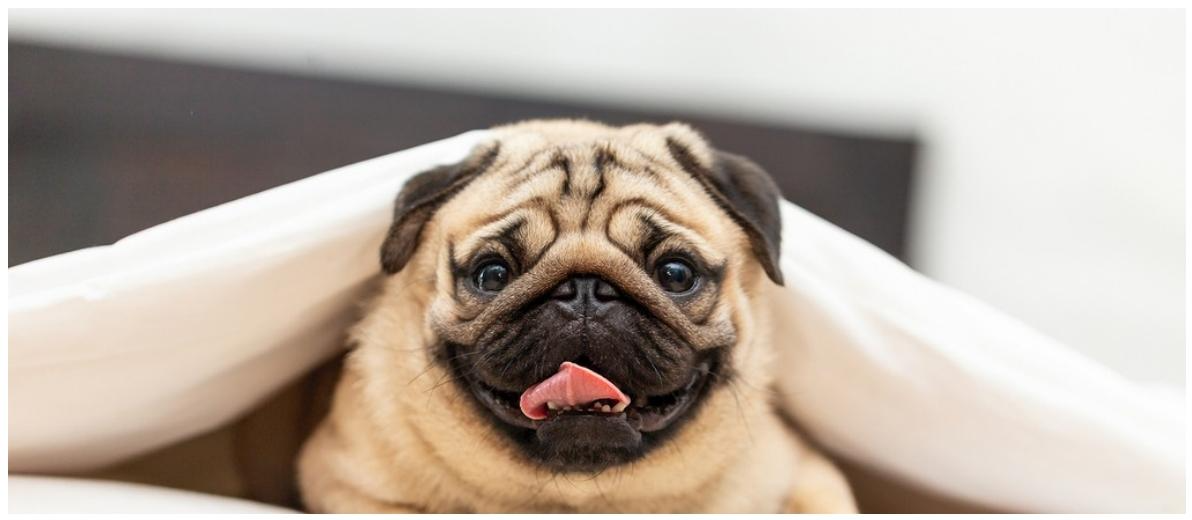
The Ultimate Guide to Pet Photography: Pro Tips for Stunning Photos
Capturing the unique personality and boundless energy of a pet is one of the most rewarding challenges in photography. Unlike static subjects, animals are unpredictable, full of motion, and communicate without words. This guide is designed to be your definitive resource, merging technical knowledge with creative strategy to help you move beyond simple snapshots to creating truly memorable and professional-grade pet portraits. We will delve into everything from the fundamental gear and camera settings to advanced techniques for capturing action and adapting to unpredictable weather, ensuring you’re prepared for any photographic opportunity.
Essential Gear and Camera Settings for Pet Photography
The foundation of great pet photography lies in understanding and utilizing your equipment effectively. While the photographer’s skill is paramount, the right tools and settings can dramatically increase your success rate, especially when dealing with fast-moving subjects. This section breaks down the ideal gear and the non-negotiable camera settings you need to master.
Choosing the Right Camera and Lenses
Your choice of camera and lens directly impacts the quality and style of your images. A camera that performs well in various lighting conditions and can capture action is crucial.
- Camera Body: A DSLR or mirrorless camera is highly recommended due to their manual controls, superior image quality, and ability to use interchangeable lenses. Look for models with a fast continuous shooting mode (burst mode) and a reliable autofocus system.
- Prime Lenses: A lens like a 50mm f/1.8 is an excellent, affordable starting point. Its wide aperture (low f-number) allows for a shallow depth of field, creating a beautifully blurred background (bokeh) that makes your pet pop from the scene.
- Telephoto Lenses: A lens such as a 70-200mm is invaluable for capturing pets from a distance. This is particularly useful for shy animals or for getting candid action shots without disturbing their play. It also helps compress the background for a pleasing portrait effect.
Mastering Camera Settings for Sharp, Dynamic Shots
To capture the perfect moment, you must be in control of your camera’s core settings. Relying on auto mode will often result in blurry or poorly exposed images. Shutter Priority (Tv/S) or full Manual (M) mode offers the most control.
- Shutter Speed: This is arguably the most critical setting for pet photography. To freeze motion and ensure a sharp image of a moving pet, you need a fast shutter speed. Start with 1/500s for a walking pet and increase to 1/1000s or faster for pets that are running, jumping, or shaking.
- Aperture: The aperture (f-stop) controls the depth of field. A wide aperture like f/1.8 to f/4 will isolate your pet from the background, which is ideal for portraits. For shots where you want more of the environment in focus or are photographing multiple pets, a narrower aperture like f/5.6 or f/8 might be necessary.
- ISO: ISO controls the camera’s sensitivity to light. On bright, sunny days, keep it low (ISO 100-400). In lower light or when you need a very fast shutter speed, you’ll need to increase the ISO. Use Auto ISO with a maximum limit (e.g., 3200 or 6400) to let the camera adjust automatically without introducing excessive digital noise.
The Power of Autofocus and Burst Mode
Your camera’s focus and drive modes are your best friends for capturing fleeting moments. Set them up correctly before you even start shooting.
- Autofocus Mode: Use Continuous Autofocus (AF-C for Nikon/Sony, AI Servo for Canon). This mode continuously tracks a moving subject as long as you half-press the shutter, ensuring your pet stays in focus as they move towards or away from you.
- Drive Mode: Switch your camera to Continuous High-Speed Shooting (Burst Mode). This allows you to take a rapid series of photos by holding down the shutter button. This technique dramatically increases your chances of capturing that one perfect frame with the ideal expression, pose, and sharpness.

Core Compositional Techniques to Elevate Your Photos
Beyond technical settings, composition is what transforms a simple picture into a compelling photograph. It’s how you arrange the elements within the frame to guide the viewer’s eye and tell a story. Applying a few fundamental principles will instantly improve the impact of your pet photos.
Get on Their Level: The Eye-Level Perspective
One of the most common mistakes in pet photography is shooting from a standing position, looking down at the animal. This perspective can make the pet seem small and disconnected. To create an intimate and engaging portrait, you must get down on their level. Lie on the ground if you have to. Shooting from your pet’s eye level invites the viewer into their world and creates a much more powerful and personal connection.
The Eyes Have It: Nailing Critical Focus
Just like in human portraiture, the eyes are the window to the soul. In 99% of pet photos, the eyes must be the sharpest point of focus. If the eyes are sharp, the viewer will perceive the entire image as focused, even with a shallow depth of field. Use your camera’s single-point AF to precisely place your focus point directly on the pet’s nearest eye.
Applying Classic Rules: Rule of Thirds and Negative Space
Compositional rules provide a framework for creating balanced and visually appealing images.
- Rule of Thirds: Imagine your frame is divided into a 3×3 grid. Instead of placing your pet dead center, position them along one of the lines or at an intersection point. This creates a more dynamic and interesting composition. If your pet is looking or moving in a certain direction, leave space in front of them for them to “look into.”
- Negative Space: This refers to the empty area around your subject. Don’t be afraid to use it. A clean, uncluttered background with plenty of negative space can help emphasize your pet, making them the undeniable hero of the shot and adding a sense of scale or solitude.
Filling the Frame for Impactful Portraits
While negative space is a powerful tool, so is its opposite. To capture the intricate details of your pet’s face—the texture of their fur, the wetness of their nose, the light in their eyes—get close and fill the entire frame with their head and shoulders. This technique creates a powerful, intimate portrait that is full of character and emotion.

Capturing the Action: Photographing Pets at Play
Photographing a pet in motion is the ultimate test of your skills and camera settings. These dynamic moments—a dog catching a ball, a cat pouncing on a toy—are often the most expressive and memorable. Success requires a combination of preparation, technical precision, and anticipation.
Preparation is Key: Location, Toys, and Assistance
Before you even pick up the camera, set the stage for success. A well-planned environment can make all the difference.
- Choose a Safe Location: Select a secure, preferably fenced-in area where the pet can play without risk. A familiar park or backyard is often best, as the pet will be more comfortable and act more naturally.
- Bring Props: Have a collection of their favorite toys, balls, or frisbees on hand to encourage play. Treats are also essential for rewarding them and keeping their attention.
- Enlist an Assistant: Having a friend or family member to help can be a game-changer. They can throw the ball, wrangle the pet, and hold their attention while you focus solely on framing the shot and capturing the moment.
Freezing Motion: The Role of High Shutter Speeds
As mentioned in the settings section, a high shutter speed is non-negotiable for action photography. To freeze a dog in mid-air or capture the intensity of a chase, you must use a shutter speed of at least 1/1000s. For extremely fast movements, don’t hesitate to push it to 1/2000s or even higher. This will require good light or a higher ISO, but it’s the only way to get those tack-sharp action shots.
Advanced Technique: Panning for a Sense of Speed
Panning is a creative technique used to convey motion. It involves using a slightly slower shutter speed (e.g., 1/30s to 1/125s) and moving your camera horizontally to track the pet as they run past you. The goal is to keep the pet’s head sharp while the background and their legs blur into streaks of motion. This is a difficult technique that requires practice, but it can produce incredibly dynamic and artistic results.
Anticipating the Moment and Capturing Expressions
The best action photographers are masters of anticipation. Watch your pet’s behavior and learn to predict their movements. Know the “peak” of the action you want to capture—the moment a dog is at the apex of its jump or the instant a cat begins its pounce. Use burst mode to fire off a sequence of shots just before, during, and after this peak moment to ensure you don’t miss it. Pay close attention to their facial expressions, as a shot with their ears perked and eyes wide with excitement is far more compelling.

Adapting to the Elements: Pet Photography in Any Weather
The weather and lighting conditions have a profound impact on the mood and quality of your photos. Instead of waiting for a perfect sunny day, learn to embrace different weather types, as each offers unique creative opportunities. Always remember to prioritize your pet’s comfort and safety, and protect your gear from the elements.
Harnessing the Golden Hour on Sunny Days
Bright, midday sun creates harsh shadows and can cause your pet to squint. The best time to shoot on a sunny day is during the golden hours—the first hour after sunrise and the last hour before sunset. The light is soft, warm, and directional, creating beautiful highlights and long, gentle shadows. If you must shoot in midday sun, find an area of open shade, like under a large tree, to get soft, even lighting.
Leveraging Soft Light on Overcast Days
Many photographers consider an overcast day to be the perfect condition for portraits. The clouds act as a giant softbox, diffusing the sunlight and creating soft, even light with minimal shadows. This is excellent for showing off the rich details and colors in a pet’s fur. The only challenge is that the light can sometimes be flat; you can add a pop of light and a catchlight in the pet’s eyes by using a reflector or a touch of off-camera flash.
Creative Opportunities in the Rain
While rain requires protecting your camera with a rain sleeve or even a plastic bag, it can yield stunning and atmospheric photos. Look for reflections in puddles to create unique compositions. A fast shutter speed can freeze individual raindrops in the air, while a slower one can render them as streaks. Focus on the details, like water droplets clinging to your pet’s fur, to tell a story about the environment.
Mastering Snow Photography for a Winter Wonderland
Snowy landscapes provide a beautiful, high-key background that can make your pet stand out. However, camera light meters are often fooled by the bright white snow, leading to underexposed images where the snow appears grey. To counteract this, you need to use exposure compensation, typically dialing it up to +1 or +2 stops to render the snow as a clean white. A fast shutter speed is perfect for capturing the magic of snowflakes falling or being kicked up by a playful pup. Remember to keep your batteries warm, as cold drains them quickly.

The Mindset of a Pet Photographer
Technical proficiency is only half the battle. Successful pet photography is deeply rooted in patience, empathy, and an understanding of animal behavior. The connection you build with the animal is often reflected in the final images. This approach shares many similarities with wildlife photography, where observation and patience are paramount.
Patience and Understanding Animal Behavior
You cannot direct a pet in the same way you direct a human. The most important skill you can develop is patience. Sessions must be dictated by the pet’s mood and energy levels. Spend time simply observing the animal. Learn their habits, what excites them, and what makes them calm down. Understanding their behavior allows you to anticipate their actions and capture genuine moments rather than forced poses.
Creating a Comfortable and Safe Environment
A stressed or fearful pet will not photograph well. Your primary role is to ensure the animal feels safe and comfortable. Start by letting them get used to you and your camera. Let them sniff the gear. Use a quiet shutter mode if your camera has one. Use positive reinforcement with treats and praise. Never force an animal into a situation where it feels anxious. The session should feel like playtime, not a chore.
Using Treats and Toys Effectively
Treats and toys are essential tools for getting and holding a pet’s attention. To get that classic head-tilt, try making a new, interesting noise. To get them to look at the camera, hold a treat or a squeaky toy right above your lens. For action shots, use a favorite ball or toy to initiate play. However, use them strategically. Over-treating can lead to a less-focused pet, so use them as rewards for desired behaviors.
Frequently Asked Questions (FAQ)
- What is the single most important camera setting for action shots of pets?
- The most critical setting is a fast shutter speed. To freeze the motion of a running or jumping pet and avoid blur, you should aim for a shutter speed of at least 1/1000th of a second, and even faster if possible. This ensures that every detail, from their fur to their expression, is captured with crystal clarity.
- How do I get my pet to look at the camera?
- Getting your pet’s attention requires a bit of strategy. The most effective method is to hold a high-value treat or their favorite squeaky toy directly above or next to your camera lens. Make a sudden, interesting noise (a squeak, a whistle, or a unique word) right when you’re ready to take the shot. This will often result in a brief moment of direct eye contact with their ears perked up, perfect for a portrait.
- Can I take good pet photos with my smartphone?
- Absolutely. While dedicated cameras offer more control, modern smartphones have incredibly capable cameras. To get the best results, use Portrait Mode to simulate a shallow depth of field, get down on the pet’s eye level, and make sure you are shooting in bright, even light. Tap the screen to focus on your pet’s eyes and use the burst mode feature by holding down the shutter button to capture action.
- How do I protect my camera in bad weather like rain or snow?
- Protecting your gear is crucial. For light rain or snow, a dedicated camera rain sleeve is the best option. In a pinch, a simple plastic bag with a hole cut for the lens, secured with a rubber band, can work. In cold weather, keep spare batteries in a warm pocket inside your coat, as cold temperatures drain battery life very quickly. When coming back inside from the cold, leave your camera in its bag for an hour or two to acclimate slowly and prevent condensation from forming inside the lens and body.
- What’s the main difference between pet photography and wildlife photography?
- The primary difference is the level of control and interaction. In pet photography, you are working with a domesticated animal, which allows for a degree of direction. You can use toys, treats, and commands to influence their position and actions. Wildlife photography involves capturing animals in their natural habitat without any interaction. It relies purely on patience, fieldcraft, and anticipating the behavior of a completely untamed subject, often from a significant distance.