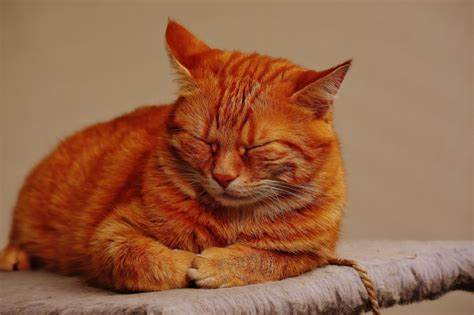
Mastering Pet Photography: Overcoming Hair-Related Challenges
Understanding Pet Fur: Types and Their Photographic Challenges
Pet photography often presents unique obstacles, with hair-related issues being among the most common and complex. The diverse range of fur types, from sleek and reflective to dense and textured, interacts with light and camera sensors in myriad ways, impacting sharpness, detail, and overall image quality. Understanding the inherent properties of different coats is the foundational step toward mastering these challenges. Without this insight, photographers may struggle with blown highlights, lost shadow detail, or a general lack of definition that detracts from the pet’s natural beauty. This section delves into the ‘why’ behind these difficulties, exploring the physics of light interaction with various fur structures and how this translates into specific photographic hurdles.
Short, Smooth Coats: Reflectivity and Detail
Pets with short, smooth, or glossy coats, such as Dobermans, Boxers, or certain cat breeds, often pose challenges related to reflectivity. Their fur can act like a mirror, producing harsh specular highlights or reflections that can obscure underlying muscle definition and color. The lack of deep texture also means that lighting needs to be precise to add dimension, as flat lighting can make these coats appear two-dimensional and uninteresting. The goal is to capture the subtle sheen without sacrificing detail or creating distracting hotspots.
Long, Flowing Hair: Motion, Matting, and Detail Loss
Breeds like Afghan Hounds, Shih Tzus, or long-haired cats present a different set of problems. Their extensive, flowing hair is prone to motion blur, especially during dynamic shots, and can easily become matted or tangled, creating unsightly clumps in photos. Capturing individual strands and maintaining definition across a voluminous coat requires careful attention to shutter speed, depth of field, and wind control. The sheer volume of hair can also absorb light, leading to underexposure or a lack of vibrancy if not properly illuminated.
Dense, Double Coats: Depth, Shadows, and Static
Pets with dense double coats, such as Huskies, German Shepherds, or Samoyeds, possess an incredible amount of fur that can create deep shadows and make it difficult to achieve separation from the background. The sheer thickness can also make it challenging for light to penetrate, resulting in a loss of texture and detail within the deeper layers of the coat. Furthermore, these coats are often prone to static electricity, especially in dry environments, leading to flyaway hairs that can be distracting and tedious to correct in post-production. The key here is to reveal the luxurious depth without making the pet appear like a shapeless mass.
Curly/Wiry Coats: Texture Definition and Light Absorption
Curly or wiry-haired breeds, like Poodles, Terriers, or Portuguese Water Dogs, have unique texture challenges. While their fur offers natural character, defining each curl or coarse strand can be difficult. These coats can also absorb a significant amount of light, especially darker colors, making them appear flat or underexposed if not lit carefully. The goal is to highlight the distinctive texture without losing the overall form or creating an overly harsh appearance.

Pre-Shoot Preparation: Grooming & Environment Control
The success of a pet photography session, particularly when dealing with hair-related challenges, often hinges on meticulous preparation long before the camera even comes out. This isn’t just about making the pet look tidy; it’s about optimizing their coat for photographic conditions, minimizing distractions, and ensuring a smoother workflow. Neglecting pre-shoot preparation can lead to hours of extra work in post-processing or, worse, irreversible issues that compromise the final image quality. This phase is about proactive problem-solving, setting the stage for stunning results by addressing potential hair-related pitfalls before they arise.
The Importance of Grooming: Brushing, Bathing, De-shedding
Proper grooming is paramount. A clean, well-brushed coat reflects light more predictably and showcases natural textures better. For long-haired breeds, thorough brushing removes tangles and loose hair, preventing matting and flyaways. For double-coated pets, de-shedding tools can significantly reduce stray hairs. Bathing, if appropriate for the breed and approved by the owner, can add shine and manageability. Always communicate with the pet owner about their grooming routine and suggest specific preparations a day or two before the shoot. This might involve a professional groomer or a detailed home grooming session.
Managing the Environment: Wind, Dust, Static Electricity
The shooting environment plays a critical role. Outdoor shoots, while offering natural light, can introduce wind that whips long hair into distracting patterns or blows dust onto the coat. Consider sheltered locations or use windbreaks. Indoors, static electricity can be a major culprit for flyaway hairs, especially in dry climates. Using a humidifier, anti-static sprays (pet-safe, of course), or even just a damp cloth to lightly smooth the fur can make a significant difference. Ensure the shooting area is clean and free of pet hair from previous occupants to avoid unwanted debris.
Client Communication: Setting Expectations and Involving Owners
Effective communication with the pet owner is an often-overlooked aspect of preparation. Discuss the importance of grooming and the specific look you’re aiming for. Educate them on how different fur types react to light and motion. Empower them to be part of the solution by having them bring brushes, towels, or even a pet-safe anti-static spray. Explaining common hair challenges upfront helps manage expectations and can make them more cooperative during the shoot, perhaps even assisting with quick touch-ups or calming their pet.

Lighting Techniques for Optimal Fur Detail
Lighting is the single most crucial element in photography, and nowhere is this more evident than when capturing the intricate details of pet fur. The right lighting can transform a flat, underexposed coat into a masterpiece of texture and depth, while poor lighting can render even the most magnificent fur into an indistinguishable mass. This section explores the ‘how’ of using light to your advantage, moving beyond basic illumination to strategic techniques that highlight the unique characteristics of each fur type. Understanding how light interacts with different hair structures is essential for adding dimension, revealing color, and managing reflections, ultimately elevating the quality of your pet portraits.
Natural Light Mastery: Soft vs. Hard Light, Golden Hour, Open Shade
Natural light, when understood and harnessed correctly, can be incredibly flattering for pet fur. Soft, diffused natural light (e.g., overcast days, open shade) minimizes harsh shadows and reflections, making it ideal for most fur types, especially glossy or dark coats. It provides an even illumination that reveals subtle textures. Hard light, such as direct sunlight, can create dramatic shadows and highlights, which can be used creatively for short-haired pets to emphasize muscle tone, but it requires careful management to avoid blown highlights on reflective fur. The ‘golden hour’ (shortly after sunrise or before sunset) offers warm, soft light that can beautifully illuminate fur and add a magical glow.
Artificial Lighting Solutions: Strobes, Continuous Lights, Diffusers, Reflectors
For greater control, artificial lighting is indispensable. Studio strobes or speedlights provide powerful, controllable bursts of light, allowing for precise shaping and intensity. Continuous lights are excellent for seeing the light’s effect in real-time. Crucially, these light sources should almost always be modified. Diffusers (softboxes, umbrellas) spread and soften the light, reducing harsh shadows and reflections, making them perfect for textured or reflective fur. Reflectors bounce light back into shadow areas, lifting detail in dark coats and adding catchlights to the eyes without adding another light source. The goal is often to create broad, soft light that wraps around the pet.
Backlighting and Rim Lighting: Enhancing Texture and Separation
Backlighting, where the light source is behind the pet, can be incredibly effective for highlighting fur. It creates a beautiful rim light around the animal’s silhouette, separating them from the background and emphasizing the fine hairs and textures, particularly on long-haired or fluffy breeds. This technique adds depth and a luminous quality to the fur. When using backlighting, ensure you have a fill light (either a reflector or a secondary light source) to illuminate the front of the pet and prevent them from becoming a silhouette. The intensity of the rim light should be carefully balanced to avoid overexposure.
Dealing with Reflections and Glare: Polarizers, Angle Adjustments
Reflective fur, especially on short, dark, or glossy coats, can create distracting glare. A circular polarizer filter attached to your lens is an invaluable tool for reducing these unwanted reflections, allowing more of the fur’s true color and texture to show through. Experiment with the polarizer’s rotation to find the optimal effect. Additionally, adjusting your shooting angle relative to the light source can significantly impact reflections. Slightly changing your position can shift reflections off the most prominent areas of the fur, making them less noticeable or even eliminating them entirely. Avoid direct frontal flash, which is notorious for creating harsh reflections and red-eye.

Camera Settings & Gear for Hair-Focused Shots
Beyond preparation and lighting, the technical aspects of your camera settings and choice of gear are critical for capturing exquisite fur detail. The interplay of aperture, shutter speed, and ISO, combined with the right lens and accessories, dictates how sharp, clear, and detailed the fur appears in your final image. Understanding these elements allows you to make informed decisions that directly address the specific challenges posed by various fur types, from freezing the motion of flowing hair to ensuring every strand is in crisp focus. This section breaks down the essential camera parameters and equipment considerations, providing a roadmap for achieving technically superior pet portraits.
Aperture (Depth of Field): Balancing Sharpness and Background Blur
Aperture controls the depth of field (DoF), which is the range of sharpness in your image. For fur-focused shots, a wider aperture (smaller f-number, e.g., f/2.8, f/4) can create a shallow DoF, blurring the background and making the pet’s fur stand out. However, with very shallow DoF, it’s crucial to ensure the most important parts of the fur (e.g., around the eyes or a prominent curl) are tack sharp. For full body shots of very fluffy or long-haired pets, a slightly narrower aperture (e.g., f/5.6, f/8) might be necessary to keep more of the fur in focus and avoid parts of the coat falling out of the sharp plane. Always prioritize sharp eyes, then consider the fur.
Shutter Speed: Freezing Motion vs. Showing Flow
Shutter speed is vital for managing motion, especially with active pets or flowing hair. To freeze action and ensure individual hairs are sharp, a fast shutter speed (e.g., 1/500s or faster) is often required. This is particularly important for long-haired breeds where movement can cause significant blur. Conversely, a slightly slower shutter speed, combined with panning, can introduce intentional motion blur to convey a sense of movement in flowing hair, creating an artistic effect. Always err on the side of faster shutter speeds if sharpness is your primary goal, especially when working with unpredictable animals.
ISO: Managing Noise in Detailed Fur
ISO determines your camera’s sensitivity to light. While a higher ISO allows for faster shutter speeds or smaller apertures in low light, it also introduces digital noise, which can degrade image quality and obscure fine fur details. For optimal fur texture, aim for the lowest possible ISO (e.g., ISO 100-400). If you must increase ISO, try to stay within your camera’s acceptable noise range. Modern cameras handle higher ISOs better, but noise reduction in post-processing should be a last resort, as it can soften details. Good lighting reduces the need for high ISO.
Lens Choices: Primes vs. Zooms, Macro for Extreme Detail
The choice of lens significantly impacts fur capture. Prime lenses (fixed focal length) often offer wider apertures and superior sharpness, making them excellent for isolating pets and rendering fur with incredible detail. A 50mm, 85mm, or 135mm prime lens is a popular choice for pet portraits. Zoom lenses offer versatility but may have slightly narrower maximum apertures and can be less sharp at their extremes. For extreme close-ups of specific fur textures or individual hairs, a macro lens is indispensable, allowing you to capture intricate patterns and colors that are invisible to the naked eye.
Essential Accessories: Brushes, Blowers, Lint Rollers
Beyond the camera, certain accessories can be game-changers. A good quality pet brush or comb for on-the-spot touch-ups is crucial. A small, portable pet blower can help fluff up fur for added volume or remove loose hairs. Lint rollers are excellent for picking up stray hairs from clothing or props. For managing static, a pet-safe anti-static spray or even a slightly damp cloth can smooth down flyaways. These small tools can save significant time in post-processing by addressing minor issues instantly.
Post-Processing Strategies for Perfecting Pet Fur
While preparation, lighting, and camera settings lay the groundwork, post-processing is where you fine-tune and perfect the intricate details of pet fur. Even with the best capture, digital editing allows you to enhance textures, correct imperfections, and ensure the fur looks its absolute best. This phase is not about salvaging bad photos but about elevating good ones to exceptional. Understanding the specific tools and techniques available in software like Adobe Lightroom or Photoshop is crucial for bringing out the vibrancy, sharpness, and definition of every strand of hair, transforming raw images into stunning, polished portraits.
Retouching Fur: Cleaning up Stray Hairs, Enhancing Texture
One of the most common tasks in post-processing is cleaning up stray hairs. Tools like the Spot Healing Brush, Clone Stamp, or Content-Aware Fill in Photoshop are invaluable for removing distracting individual hairs, lint, or debris from the coat. For enhancing texture, subtle use of clarity, texture, or sharpening sliders in Lightroom can bring out the definition in fur without making it look unnatural. In Photoshop, techniques like frequency separation can be used to smooth fur while preserving texture, or to selectively sharpen specific areas without affecting the overall image.
Exposure and Contrast Adjustments: Bringing Out Detail in Dark/Light Fur
Correct exposure and contrast are fundamental. For dark-furred pets, slightly increasing shadows and blacks, or using local adjustments (e.g., radial filters, adjustment brushes) to brighten specific fur areas, can reveal hidden detail. For white or light-furred pets, careful management of highlights and whites is essential to prevent blown-out areas. Reducing highlights and adding a touch of contrast can help maintain texture. The goal is to achieve a balanced exposure that showcases the fur’s true color and texture without losing detail in either the brightest or darkest areas.
Color Correction: Ensuring Natural Fur Tones
Accurate color representation is vital for pet fur. White balance should be set correctly in-camera or adjusted in post-processing to ensure the fur’s natural tones are preserved. Sometimes, ambient light can cast unwanted color shifts (e.g., blue from shade, yellow from indoor lights). Using the white balance eyedropper tool on a neutral gray area (if present) or manually adjusting temperature and tint can correct this. For specific color enhancements, selective hue, saturation, and luminance (HSL) adjustments can be used to subtly boost the richness of fur colors without making them look artificial.
Sharpening Techniques: Selective Sharpening for Fur
Sharpening should be applied judiciously. Over-sharpening can introduce artifacts or a ‘crunchy’ look, especially on fine fur. Start with a global sharpening pass, then use selective sharpening techniques to target specific areas of the fur. In Lightroom, the Masking slider in the Detail panel is powerful for applying sharpening only to edges, leaving smooth areas untouched. In Photoshop, techniques like High Pass sharpening on a separate layer with a soft light blending mode, combined with layer masks, allow for precise control over where sharpening is applied, ensuring eyes and key fur details are crisp while avoiding over-processing.
Noise Reduction: Maintaining Detail While Reducing Grain
If higher ISOs were necessary during capture, noise reduction might be required. Modern software offers sophisticated noise reduction tools. Apply noise reduction carefully, as aggressive application can soften or smooth out fine fur details, making the pet look plastic. It’s often best to apply a moderate amount of luminance noise reduction and then selectively re-sharpen the fur. Experiment with the balance between reducing noise and preserving detail. Some photographers prefer to apply noise reduction to the color channels only, leaving luminance noise for a more natural, film-like grain.
Pro Tips for Handling Challenging Fur Types
Beyond the general techniques, certain fur types demand specialized attention. These expert insights can make a significant difference in overcoming persistent challenges and elevating your pet photography to a professional level, ensuring every unique coat is captured with precision and artistry.
- For Black Pets: Use rim lighting extensively to define their silhouette and separate them from the background. Overexpose by about +0.7 to +1.0 stops to prevent crushed blacks and reveal fur detail, then adjust in post-processing. Focus on eyes and nose for critical sharpness, as fur detail can be harder to achieve.
- For White Pets: Be extremely careful with highlights. Underexpose slightly (e.g., -0.3 to -0.7 stops) to protect highlights, then brighten shadows in post. Use soft, diffused light to avoid harsh shadows and blown-out fur. A slightly darker background can help the white fur pop without overexposing.
- For Long-Haired Breeds: Always have a brush and comb on hand for immediate touch-ups. Consider a fan or gentle breeze to create natural flow, but be mindful of controlling it. Use fast shutter speeds to freeze motion, and a slightly narrower aperture (e.g., f/4-f/5.6) to keep more of the voluminous fur in focus.
- For Curly/Wiry Coats: Embrace the texture! Use directional lighting (e.g., from the side or slightly behind) to enhance the curls and give them dimension. Avoid overly flat lighting. In post-processing, subtle clarity and texture adjustments can further emphasize their unique character without over-sharpening.
- Managing Shedding: If the pet is shedding, consider a pre-shoot grooming session focused on de-shedding. During the shoot, have lint rollers and sticky brushes ready. Photograph in an environment where loose hairs are less visible (e.g., a simple, non-textured background) or easy to clean up.
- Dynamic Range: Pay attention to your camera’s dynamic range capabilities. For high-contrast situations (e.g., black and white pets together), consider bracketing exposures or using fill flash to balance the light, ensuring detail in both extremes.
Comparative Analysis: Techniques for Different Fur Textures
Different fur textures respond uniquely to various photographic techniques. This table provides a quick comparison of optimal approaches for common fur types, helping you select the best strategy for your subject.
| Fur Type | Ideal Lighting | Key Camera Settings | Post-Processing Focus | Common Pitfalls |
|---|---|---|---|---|
| Short, Smooth | Soft, directional side light; controlled reflections | Fast shutter (action), f/2.8-f/4 (shallow DoF) | Reflection reduction, contrast, minor sharpening | Harsh glare, flat appearance, lost muscle definition |
| Long, Flowing | Backlight (rim light); soft fill light | Very fast shutter (1/500+), f/4-f/5.6 (more DoF) | Stray hair cleanup, texture enhancement, motion blur control | Motion blur, matting, tangled fur, lack of separation |
| Dense, Double | Strong side light (texture); soft, broad light (depth) | Balanced exposure, f/5.6-f/8 (deeper DoF) | Shadow recovery, texture definition, color accuracy | Lost detail in shadows, shapeless mass, static flyaways |
| Curly/Wiry | Directional light (from side/behind) to define texture | Moderate shutter, f/4-f/5.6 (balance sharpness & DoF) | Clarity/texture boost, selective sharpening | Flat lighting, over-sharpening, lost individual curl definition |
Essential Checklist for Hair-Perfect Pet Photos
Before, during, and after your pet photography session, this checklist ensures you’ve covered all bases to overcome hair-related challenges and produce stunning, detailed images.
- Pre-Shoot Preparation:
- Consult with owner about grooming routine and expectations.
- Recommend professional grooming or thorough home brushing/bathing.
- Prepare pet-safe anti-static spray if needed.
- Clean the shooting environment of loose hairs and dust.
- Scout locations for controlled wind/shelter.
- During the Shoot:
- Have a pet brush/comb, lint roller, and damp cloth handy.
- Utilize soft, diffused lighting (natural or artificial) for most fur types.
- Experiment with backlighting/rim lighting for texture and separation.
- Use a polarizer filter to reduce glare on reflective coats.
- Prioritize fast shutter speeds for active pets and flowing hair.
- Select appropriate aperture for desired depth of field (sharpness vs. blur).
- Keep ISO as low as possible to preserve fur detail.
- Continuously monitor for stray hairs, tangles, or static.
- Post-Processing:
- Perform initial exposure and white balance corrections.
- Carefully clean up stray hairs and minor imperfections using retouching tools.
- Adjust highlights/shadows to reveal detail in dark/light fur.
- Enhance fur texture and clarity subtly.
- Apply selective sharpening, focusing on key areas like eyes and prominent fur.
- Apply noise reduction judiciously if necessary, balancing detail preservation.
- Ensure natural fur tones through color correction.
Frequently Asked Questions (FAQ)
- Q1: How can I prevent glare on glossy black fur?
- A1: To prevent glare on glossy black fur, use soft, diffused light sources (e.g., a large softbox, overcast natural light, or open shade). Avoid direct, harsh light. Position your light source at a 45-degree angle to the pet, rather than directly in front. A circular polarizer filter on your lens is highly effective for reducing reflections and revealing the underlying fur texture. Also, slightly underexposing the shot and recovering shadows in post-processing can help maintain detail.
- Q2: What’s the best way to capture individual strands of long, flowing pet hair?
- A2: Capturing individual strands of long, flowing hair requires a combination of techniques. Use backlighting or rim lighting to make the hairs glow and separate from the background. Employ a fast shutter speed (e.g., 1/500s or faster) to freeze any motion. A lens with good sharpness and a moderately wide aperture (e.g., f/4 to f/5.6) can help keep more of the hair in focus while still blurring the background. In post-processing, subtle sharpening and clarity adjustments can enhance the definition of individual strands.
- Q3: My pet’s fur looks flat and lacks texture. How can I fix this?
- A3: Flat fur often results from flat, frontal lighting. To add texture, use directional lighting, such as side lighting or light coming from a 45-degree angle. This creates subtle